Skip to product information
1 of 2

UV Resin Starter Kit — Clear Hard Type, Fast Curing, No Mixing Required (250g + Tools)

UV Resin Starter Kit — Clear Hard Type, Fast Curing, No Mixing Required (250g + Tools)

UV Resin Starter Kit — Clear Hard Type, Fast Curing, No Mixing Required

A complete UV resin starter kit including 250g of crystal-clear hard-type UV resin and all the tools needed to get started. UV resin requires no mixing of two components — simply pour or apply, add inclusions if desired, and cure under the included UV/LED lamp in minutes. Low odor, anti-yellowing formula for long-lasting clear results.

See more See less

What’s in the Kit

  • 1 × 250g UV resin bottle — clear hard type
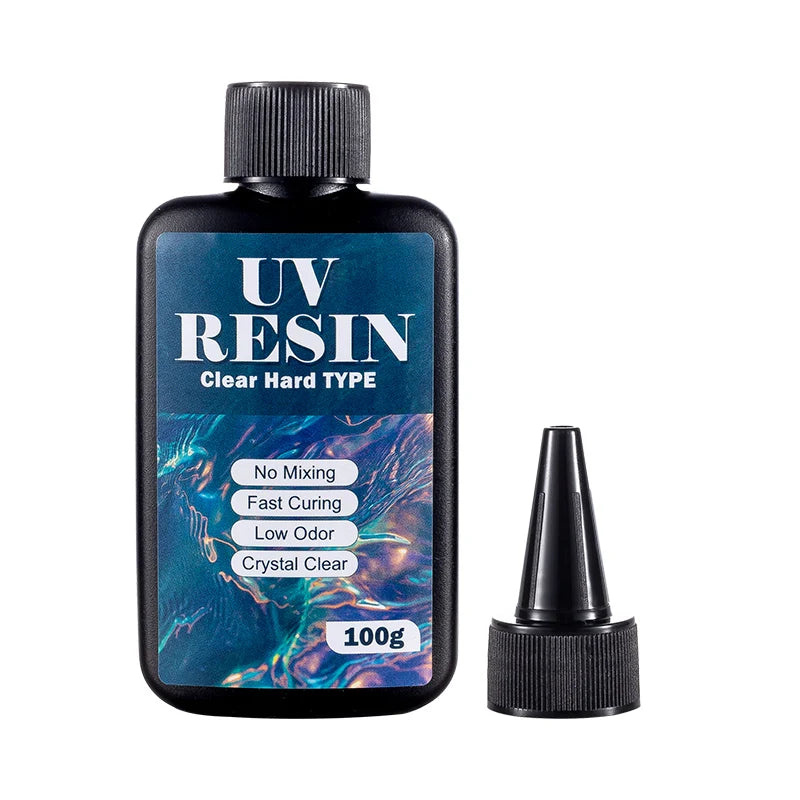
  • 1 × 100g UV resin bottle — clear hard type
  • 1 × SUN mini UV/LED curing lamp (pink)
  • 1 × silicone work mat (blue)
  • 2 × mixing/measuring cups
  • 1 × pointed tip applicator cap (fits resin bottle for precise pouring)
  • 1 × pair of protective gloves
  • ~10 × wooden stirring sticks
  • 2 × pipettes/droppers
  • 1 × palette knife / scraper

Resin Properties

  • Type: UV resin — single-component, no mixing required
  • Finish: crystal clear, high-gloss hard finish when cured
  • Curing: fast-curing under UV or LED lamp (typically 2–5 minutes depending on layer depth and lamp power)
  • Odor: low odor formula
  • Yellowing resistance: anti-yellowing properties for long-lasting clarity
  • Best for: jewelry making, pendant molds, resin coating, small craft projects, shaker charms, bezels, and UV resin art

UV Resin vs. Epoxy Resin

  • UV resin: single component, no mixing, fast cure (minutes under UV lamp), best for thin pours and small projects. Does not cure without UV/LED light exposure.
  • Epoxy resin: two components (resin + hardener), requires precise mixing, cures over 24–48 hours at room temperature without a lamp. Better suited to large, deep pours.
  • UV resin is ideal for jewelry, small molds, and coating work where speed and precision matter.

How to Use

  1. Prepare your workspace on the silicone mat. Put on gloves before handling resin.
  2. Pour or apply UV resin into your mold or bezel. Use the pointed applicator tip for precise application. Add pigment, glitter, dried flowers, or other inclusions as desired.
  3. Use a toothpick or stirring stick to spread the resin and remove any air bubbles. Pop surface bubbles by blowing gently or using a brief pass of a heat gun.
  4. Place under the UV/LED lamp and cure for 2–5 minutes. Cure time depends on the thickness of the pour and the power of the lamp — thicker layers may require longer exposure or multiple cure cycles.
  5. Check that the resin is fully cured (firm and tack-free) before demolding or handling. If still tacky, return under the lamp for additional cure time.
  6. Demold carefully. Add a UV resin top coat layer if additional gloss or depth is desired, then cure again.

Tips for Best Results

  • Work in thin layers for deep molds — UV light may not penetrate fully through a single thick pour. Pour in 2–3mm layers, curing each before adding the next.
  • Work in a warm environment — cold temperatures can cause cloudiness in UV resin. If the resin appears cloudy, warm the bottle briefly in warm (not hot) water before use.
  • Store the resin bottle away from light when not in use — UV resin will begin to cure if exposed to sunlight or bright indoor light.
  • Clean tools immediately after use with isopropyl alcohol before the resin cures.

Frequently Asked Questions

Do I need a UV lamp or will sunlight work?
Sunlight contains UV rays and can cure UV resin, but cure times are inconsistent and depend on weather and season. The included UV/LED lamp gives a consistent, controlled cure in minutes and is the recommended method.

Can I add pigment or color to this resin?
Yes — use UV resin-compatible pigments, mica powder, alcohol inks, or resin dyes. Mix thoroughly before curing. Note that heavily pigmented or opaque mixes may require longer cure times as pigment can block UV penetration.

Why is my cured resin still tacky?
Surface tackiness after curing is normal for UV resin — it is caused by oxygen inhibition at the surface. Apply a thin flood coat of fresh UV resin over the surface and cure again, or wipe the surface with isopropyl alcohol immediately after curing.

Is UV resin food-safe?
No — cured UV resin is not food-safe. Do not use for items that will come into contact with food or drink.

Shop More Resin Supplies

Browse all Resin & Kits or browse all Epoxy & UV Resin Supplies.

Color

My Crafty Corner

Regular price $34.28 USD
Regular price $0.00 USD Sale price $34.28 USD
Sale Sold out
Quantity
View full details